
Engineering
Build an engineering page from a real design decision, with examples from three team portfolios.
Show how your developed. A useful engineering page explains a problem, the designs you considered, what you tested, and why you chose the final version.
Design decisions
Start with what the needed to do. A lift might need to carry a certain load, reach a height, fit inside the robot, and extend quickly. Explain which needs mattered most, then introduce the hardware.
Compare the ideas you tried:
| Question | What to show |
|---|---|
| Could it do the job? | A , reach test, load test, or of the motion |
| Why did you choose it? | A difference in speed, size, reliability, or repair time |
| What did you give up? | A drawback you accepted |
| Did it work on the robot? | Tests with the other mechanisms installed |
If you used a weighted decision table, explain the scores and why some needs mattered more than others. Say which scores came from tests and which were the team's judgment.
Iterations
Pick changes that taught you something. Show the old design, what went wrong, what you changed, and the next test. Dates or version numbers help readers follow the order.
Two show different ways to organise those changes. Page numbers below exclude the cover.
Compare one mechanism across versions
Super 7's DECODE page 12 gives each mechanism a row and each revision a column. Read only the intake row first: the pictures stay in comparable positions, while the notes explain the grip, compression, and jamming problems that prompted another version.
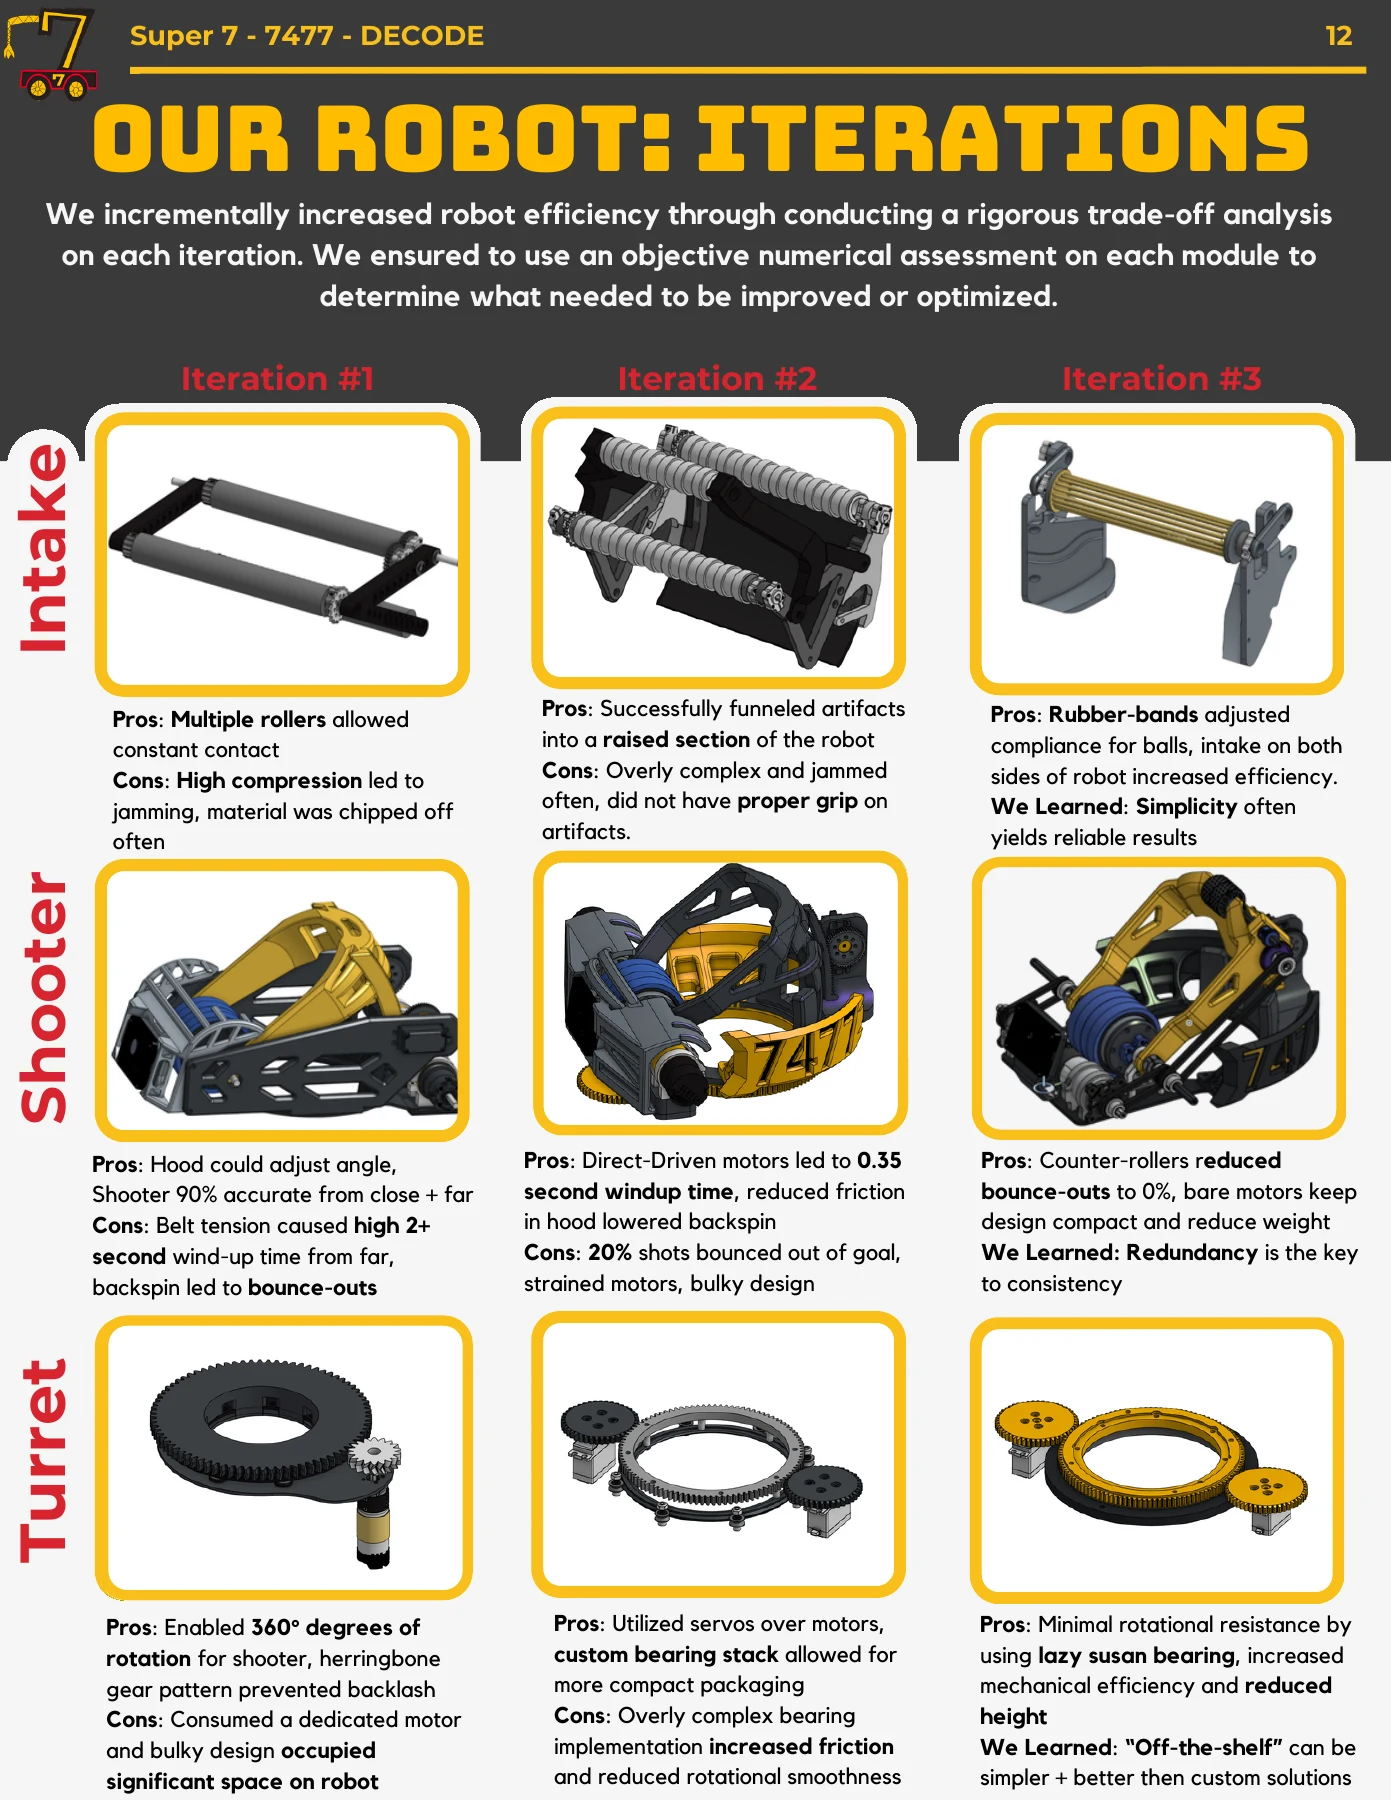
Notice three choices you can adapt:
- Each version shows the same mechanism, so the reader can locate the physical change.
- Advantages and remaining problems sit beside the relevant picture.
- The final column records a lesson, connecting the comparison to the team's next decisions.
This arrangement suits several versions of one subsystem. Use consistent views and comparison points; choose the changes that explain your decision.
Follow a revision through the season
Rebel Robotics' INTO THE DEEP page 9 organises changes by competition stage. The changes are beside the team's assessment of that robot version, with a comparison chart beneath it.
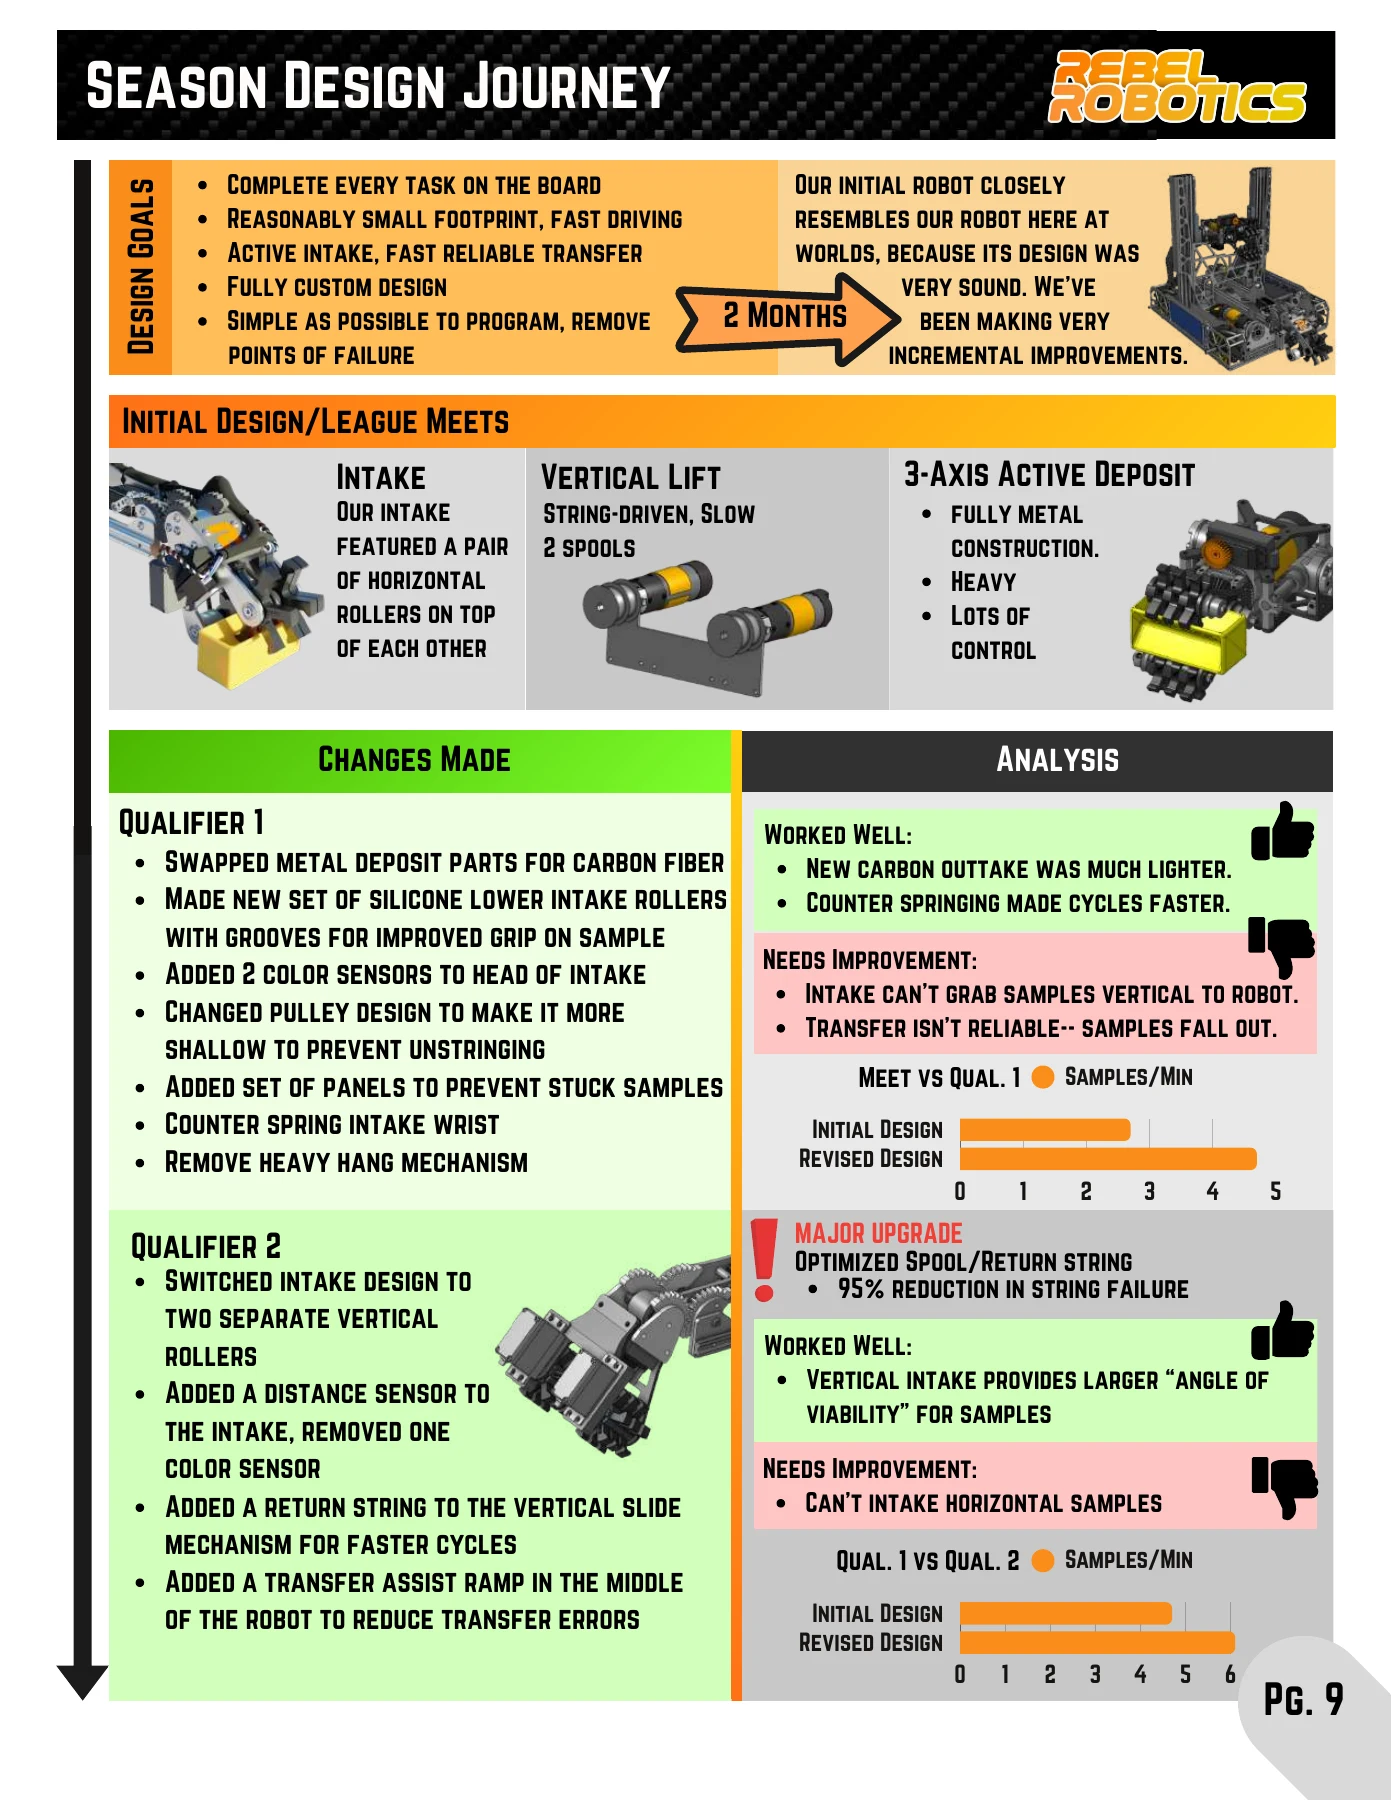
The page keeps unresolved problems visible. That gives the next revision a reason: the reader can follow what worked, what still failed, and what the team changed afterward.
Use this structure when several mechanisms changed together between events. Describe the whole robot revision and its test setup, rather than assigning the entire improvement to one part.
Before laying out your own comparison, collect the earlier version's image, the observed problem, the change, and the retest record. If a retest is still pending, label it and explain the next test instead of supplying an expected result as though it happened.
Measurements
Include units, test conditions, and the number of attempts. Say whether a result is a best run, an average, a bench test, or a match result. For time, explain where the timer starts and stops.
Check what a percentage describes. A change from 3.4 seconds to 1.1 seconds takes about 68% less time; the old time is about 3.1 times the new time. Choose wording that makes the comparison clear.
If you changed several parts at once, describe the result of that whole revision. The test alone cannot tell you how much each part helped.
Calculations
Show the question, the values and units, the calculation, and the decision it helped you make. If a estimate led you to change a gear ratio, explain what you expected and how the lift behaved in testing.
State assumptions such as estimated mass or ideal efficiency. For a simulation, show the applied load and supports, then explain what you changed after seeing the result.
Connect analysis to a part
Blu Cru's DECODE page 10 places examples of corner relief, plate analysis, and machining simulation within its design process. The reader can connect an engineering tool to the part it helped the team make.
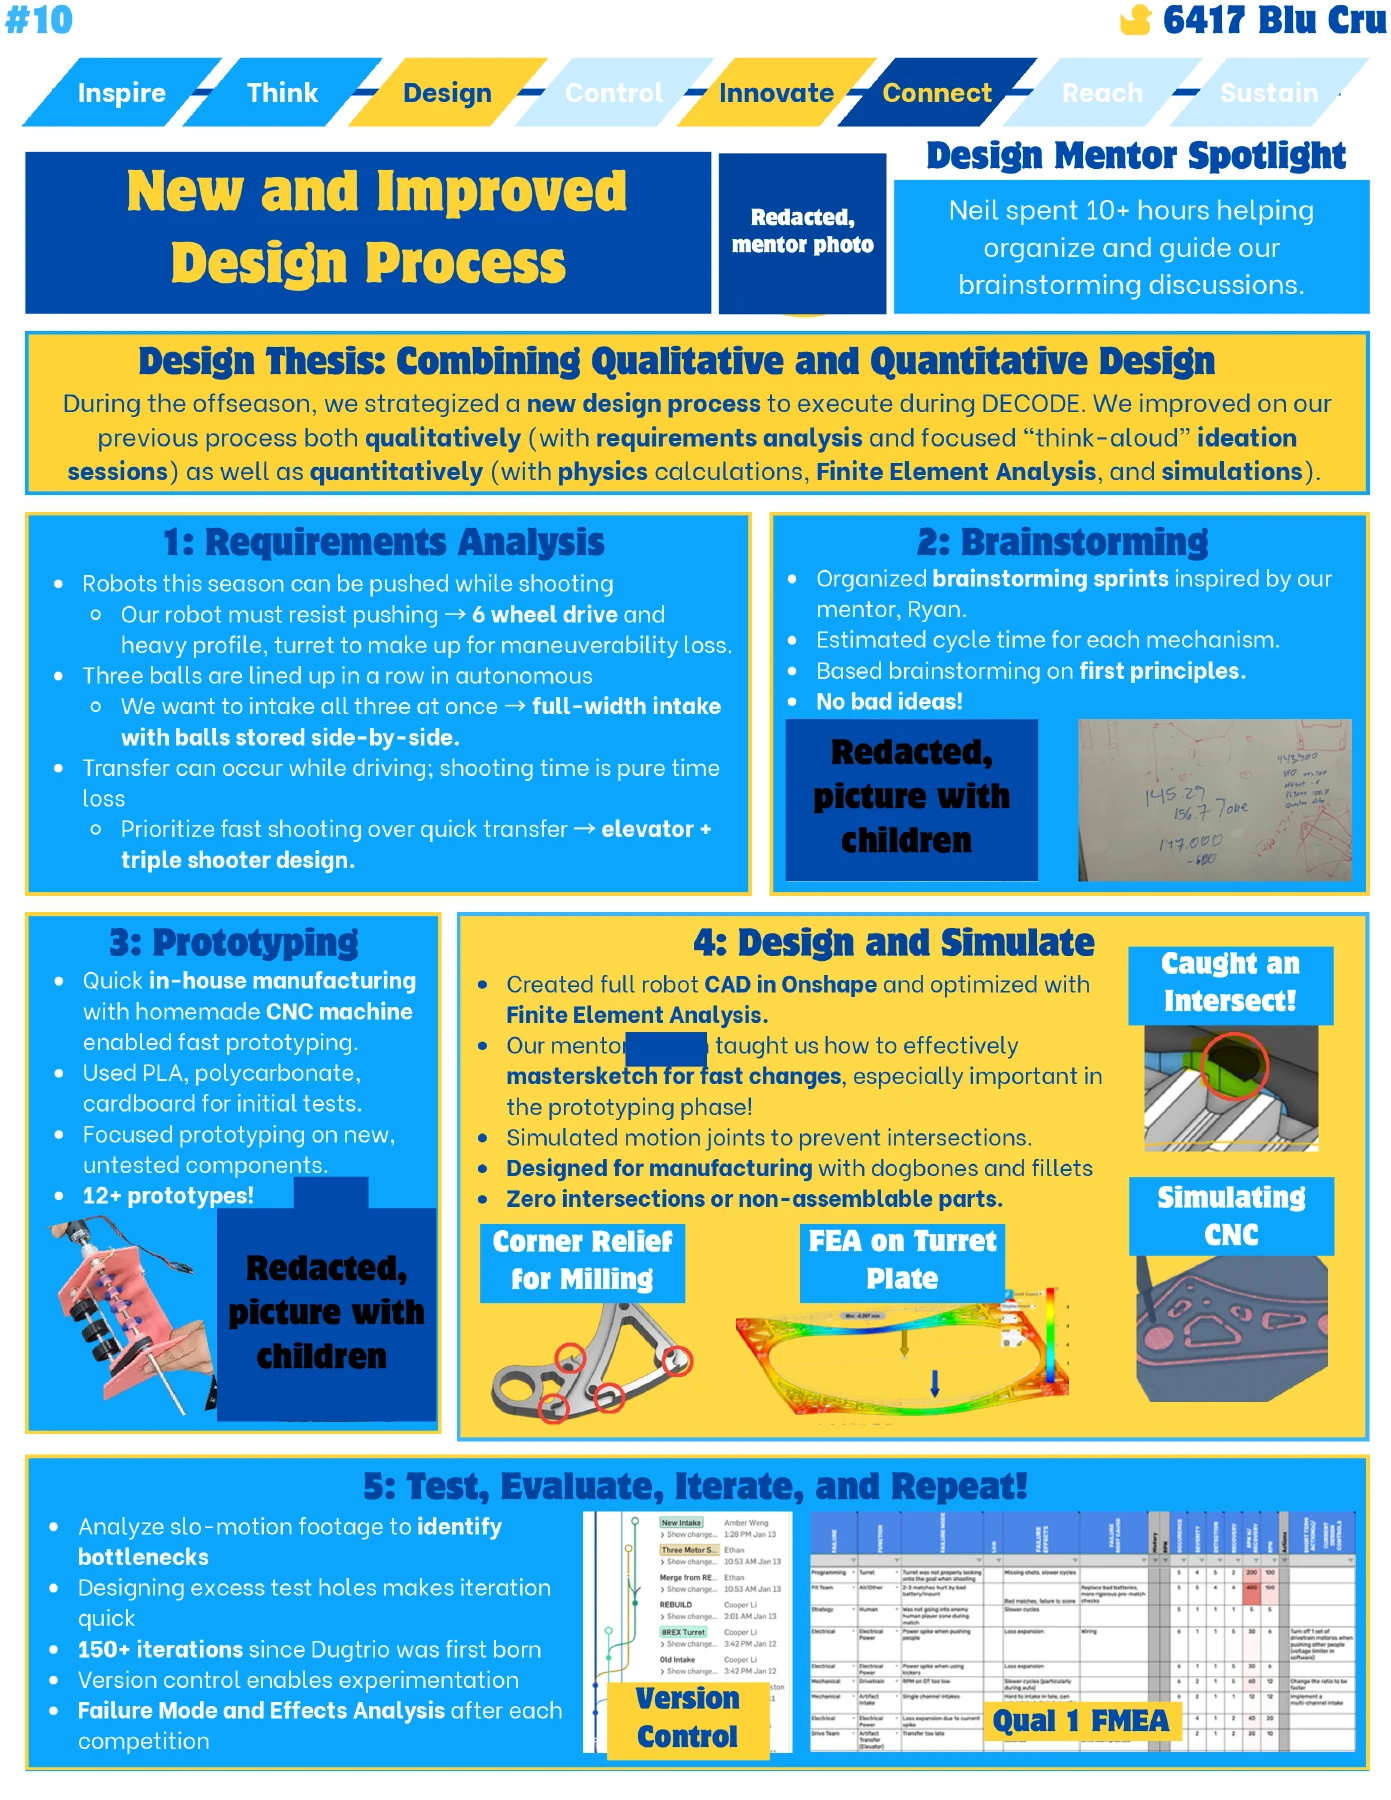
For your calculation, put the design question beside the relevant sketch. Identify the input you measured, any value you estimated, and the result that changed a , ratio, material, or test plan. Explain the physical test that followed. A coloured stress plot needs its loads, constraints, units, and the decision it informed to be useful to another reader.
The design process, CAD, and testing guides cover the engineering work behind these pages.
Whole-robot design
Use a labelled robot overview to show how the , transfer, scoring mechanism, , and controls fit together. Explain choices about balance, wire routing, moving parts, and access to .
For maintenance, show how a part comes out and what needs disconnecting. A photo with the surrounding robot visible can make the repair much easier to understand.
Draft one page
Choose one decision and assemble five pieces: the requirement, the alternatives, the observation that separated them, the selected revision, and its test result. Give the most space to the comparison that explains your choice. Put a short conclusion beside it: what you kept, what remained unresolved, and what you planned to test next.
Ask a teammate to identify the reason for the change without your help. If they can describe only the hardware, add the missing observation or comparison before polishing the layout.